

These three recipes are easy to execute and fun to make! Go on…share them with your lovers!
For the latest COVID 19 Home Cooking Series,
I present you a 3-course Date Night Menu:
Citrus Olive Salad
Pasta Fra Diavolo
Mille Feuille with Poached Pears
Serves: only 2 adults…kids can join
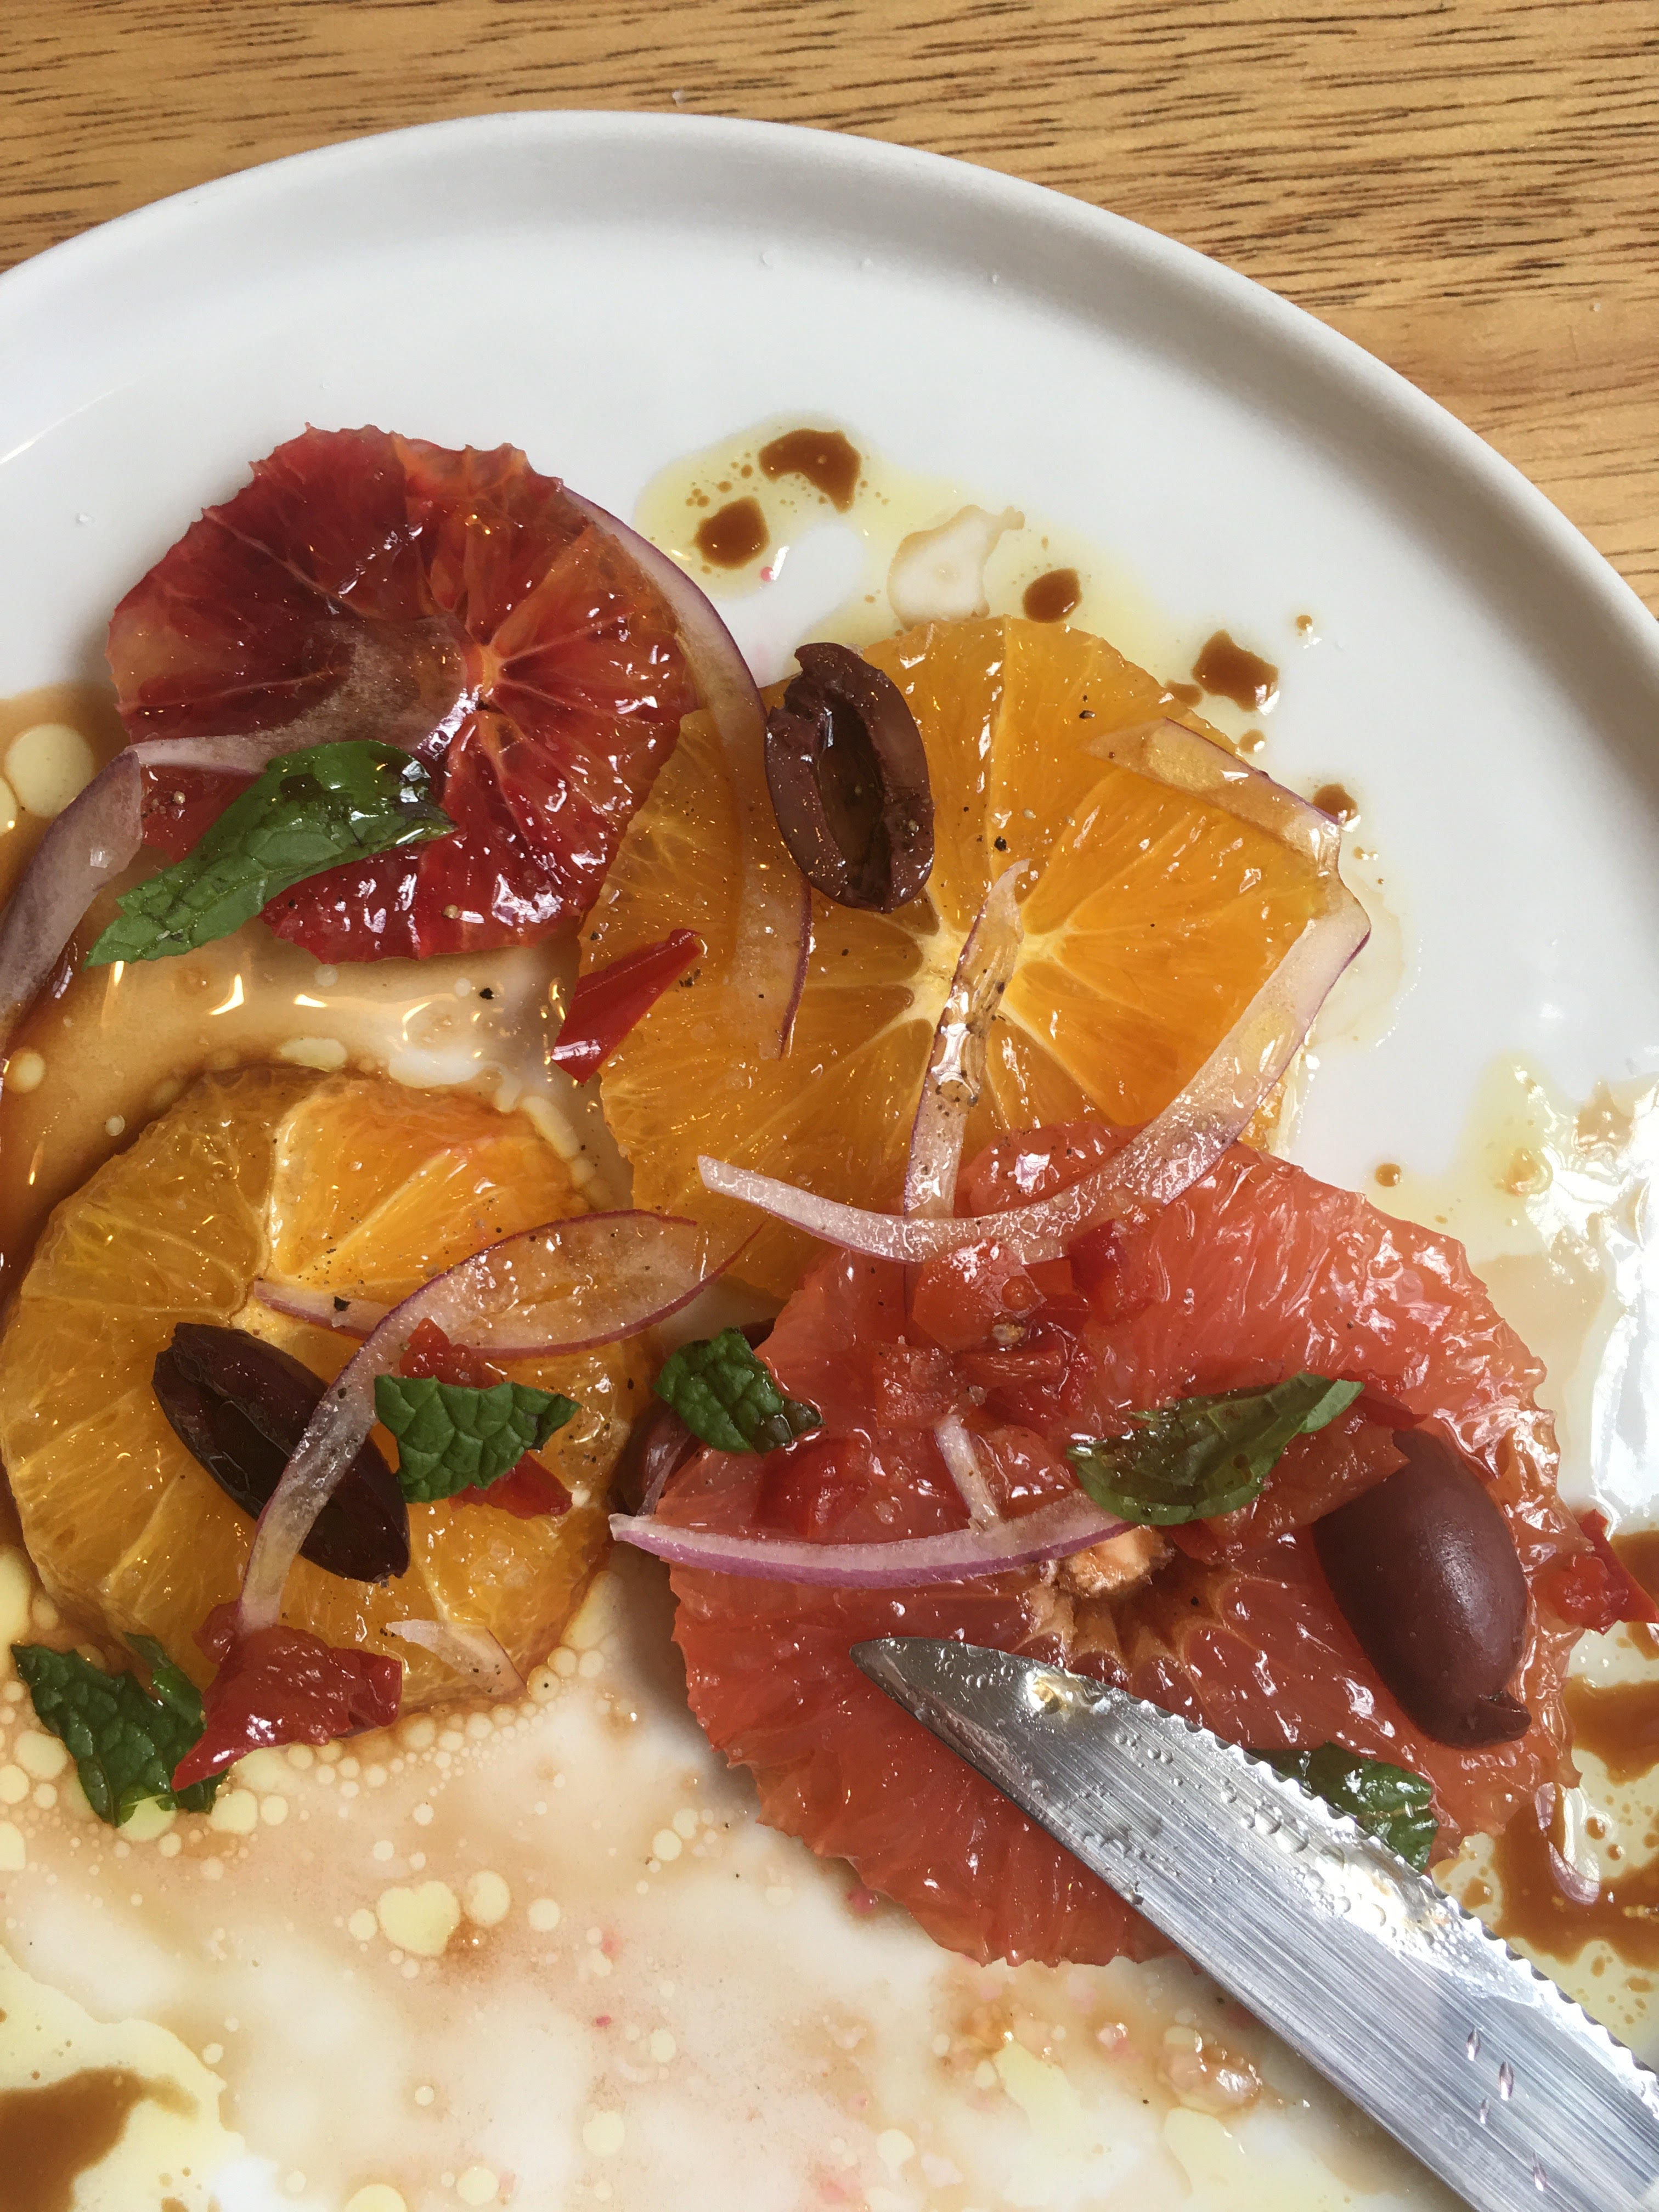 (Citrus Olive Salad with Chilies and Mint, Balsamic Sherry Vin, By Reggie Soang)
Citrus Olive Salad with Chilies and Pumpkin Seeds
Ingredients:
1 whole Grapefruit, sliced into wheels
1 whole Navel Orange, sliced into wheels
1 whole Blood Orange, sliced into wheels
1/4 cup Kalamata Olives, halved or quartered
1 Tablespoon B&G Pickled Hot Cherry Peppers, minced
2 tablespoon Mint, hand torn
1/4 piece Red Onions, sliced thin
2 Tablespoon pumpkin seeds, toasted
4 Tablespoon Balsamic Vinegar
2 Tablespoon Sherry Vinegar
1 Cup + 2 Tablespoon EVOO
1/4 teaspoon Salt
Sea Salt to taste
Ground Black Pepper to Taste
- To prep citrus, cut the top and bottom off, and then trim off the peels. Cut skinned citrus into wheels
- Drain olives and cut them in halves or quarters
- Seed pickled cherry peppers and dice them fine
- Thinly slice red onions and soak them in cold( or ice) water for 15 minutes to rid off the harsh taste
- Meanwhile, toast pumpkin seeds in 350F oven until fragrant and light brown, about 7 to 10 minutes
- To make the dressing, measure out vinegar and olive oil, shake them in a container and season with 1/4 teaspoon of salt
- To plate, place sliced citrus on a plate in a rustic fashion, sprinkle olives, red onions, and cherry hot peppers around. Tear up some mint leaves and sprinkle them as well. Season citrus with small pinches of sea salt and black paper. Drizzle balsamic sherry vinaigrette and sprinkle on toasted pumpkin seeds to finish.

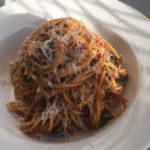
(Fra Diavolo, by Reggie Soang)
Pasta Fra Diavolo
Ingredients:
For the Sauce
1/3 cup EVOO
1 head Garlic, sliced
1 Onion, medium dice
1 teaspoon Habanero Chili, minced
2 Tablespoon Chili Flakes (your own preference on the heat level)
1 teaspoon Black Pepper, ground
1 Tablespoon Soy Sauce (optional)
1 can (28 oz.) Crushed Tomatoes
1 teaspoon MSG (optional)
1/4 cup Red Wine
1/4 cup water
Salt to Taste
To Serve Fra Diavolo with:
Any dried pasta
Handful of chopped Basil
Handful of chopped Mint
Handful of chopped Parsley
Grated Parm
- Fry off garlic and onions in olive oil on medium high heat
- Add chilies and fry until fragrant
- Deglaze with soy sauce and add crushed tomatoes
- Fry tomato sauce for 2 minutes
- Deglaze with red wine and water and add seasoning. Bring the sauce to a boil and turn it down to simmer for 30 minutes, or until it thickens
- Meanwhile, bring a pot of salted pasta water to a boil (should taste like sea water)
- When the sauce is ready, cook your dried pasta according to the package’s instructions (my experience is about 8 to 10 minutes for dried pasta)
- Drain the cooked pasta and reserve pasta water. Toss pasta with spicy tomato sauce. Tear up a handful of fresh basil and mint leaves and add to pasta. Add more pasta water if need to loosen up the noodles
- Swirl pasta with a tongue or large fork, place it in the middle of a bowl. Grate parmesan over top and drizzle EVOO around to finish
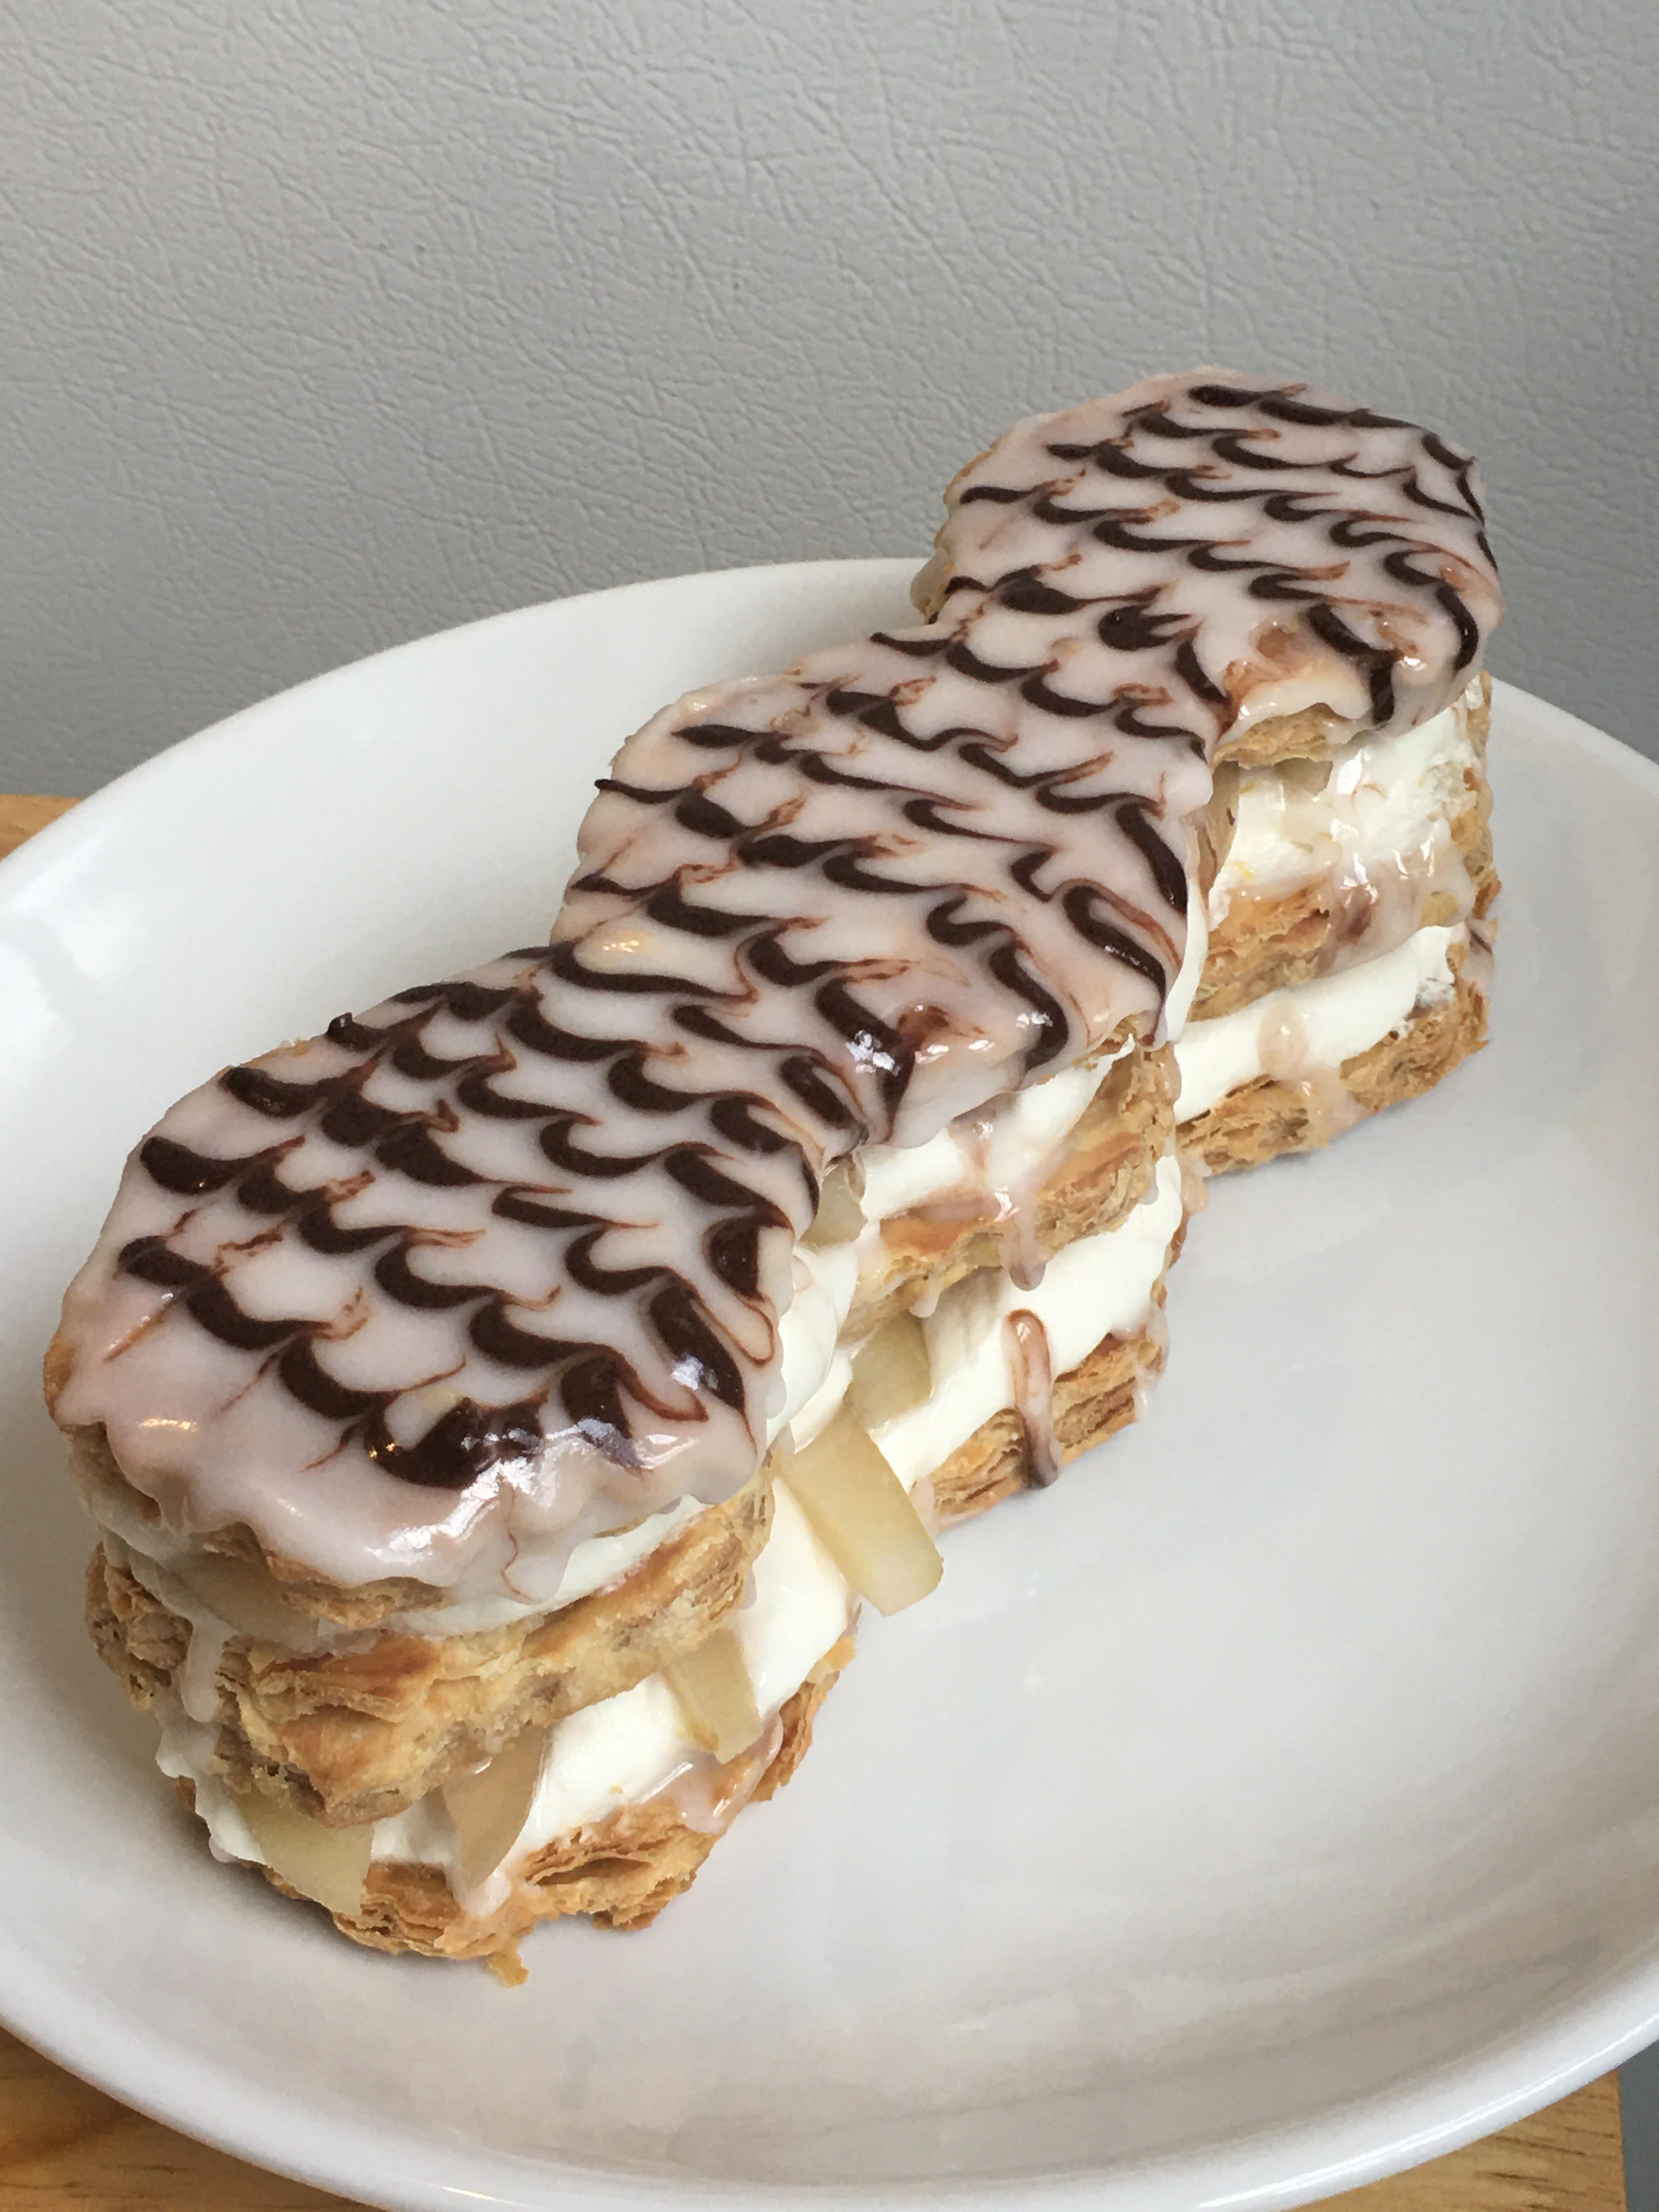
(Mille Feuille with Poached Pears, by Reggie Soang)
Mille Feuille (Napoleon)
Ingredients:
1 Package Puff Pastry
1 & 1/2 cup Heavy Cream
3 Tablespoon Confectioners Sugar
1 Tablespoon Vanilla Extract
2 Lemon worth of zest
2 Poached Pears, sliced
For Sugar Glaze:
1 and 1/2 cup Confectioners Sugar
3 Tablespoon Water
For Chocolate Glaze:
3 Tablespoon Confectioners Sugar
1 Tablespoon Cocoa Powder
3/4 Tablespoon Water
- Defrost puff pastry for 30 minutes before baking
- Bake off 2 pieces puff pastry according to the package’s instructions. Check for doneness; finished puff pastry should be fluffy and crispy. If you see any grease dough, then put the pastry back in the oven. Once puff pastry is done. Leave it to cool
- Meanwhile, make whip cream. Place cream, confectioners sugar, and vanilla extract in a bowl. Whisk until just under stiff peak. Grate lemon zests and fold them in (IMPORTANT: DON’T WHISK LEMON ZEST IN, OR YOU WILL TURN CREAM INTO BUTTER). Set aside in the fridge until ready to use
- To make the glazes. Combine ingredients according to the recipes and stir to combine
- To build mille feuille, slice puff pastry in half horizontally. You should have 4 pieces. Using a piping bag or a spoon, pipe whipped cream on puff pastry and line poached pears across, and then pipe another line of whipped cream across. Lay one piece of puff pastry on top and repeat the piping process. You could either build a 4-layer or 3-layer dessert.
- To finish, pour sugar glaze on the top and let it drip. Pipe chocolate vertically across sugar glaze and use a tooth pick to drag across perpendicularly to form arrows. Chill the dessert until ready to serve…and Bon Appétit!
 (Coconut Thai Curry White Bean Soup, by Reggie Soang)
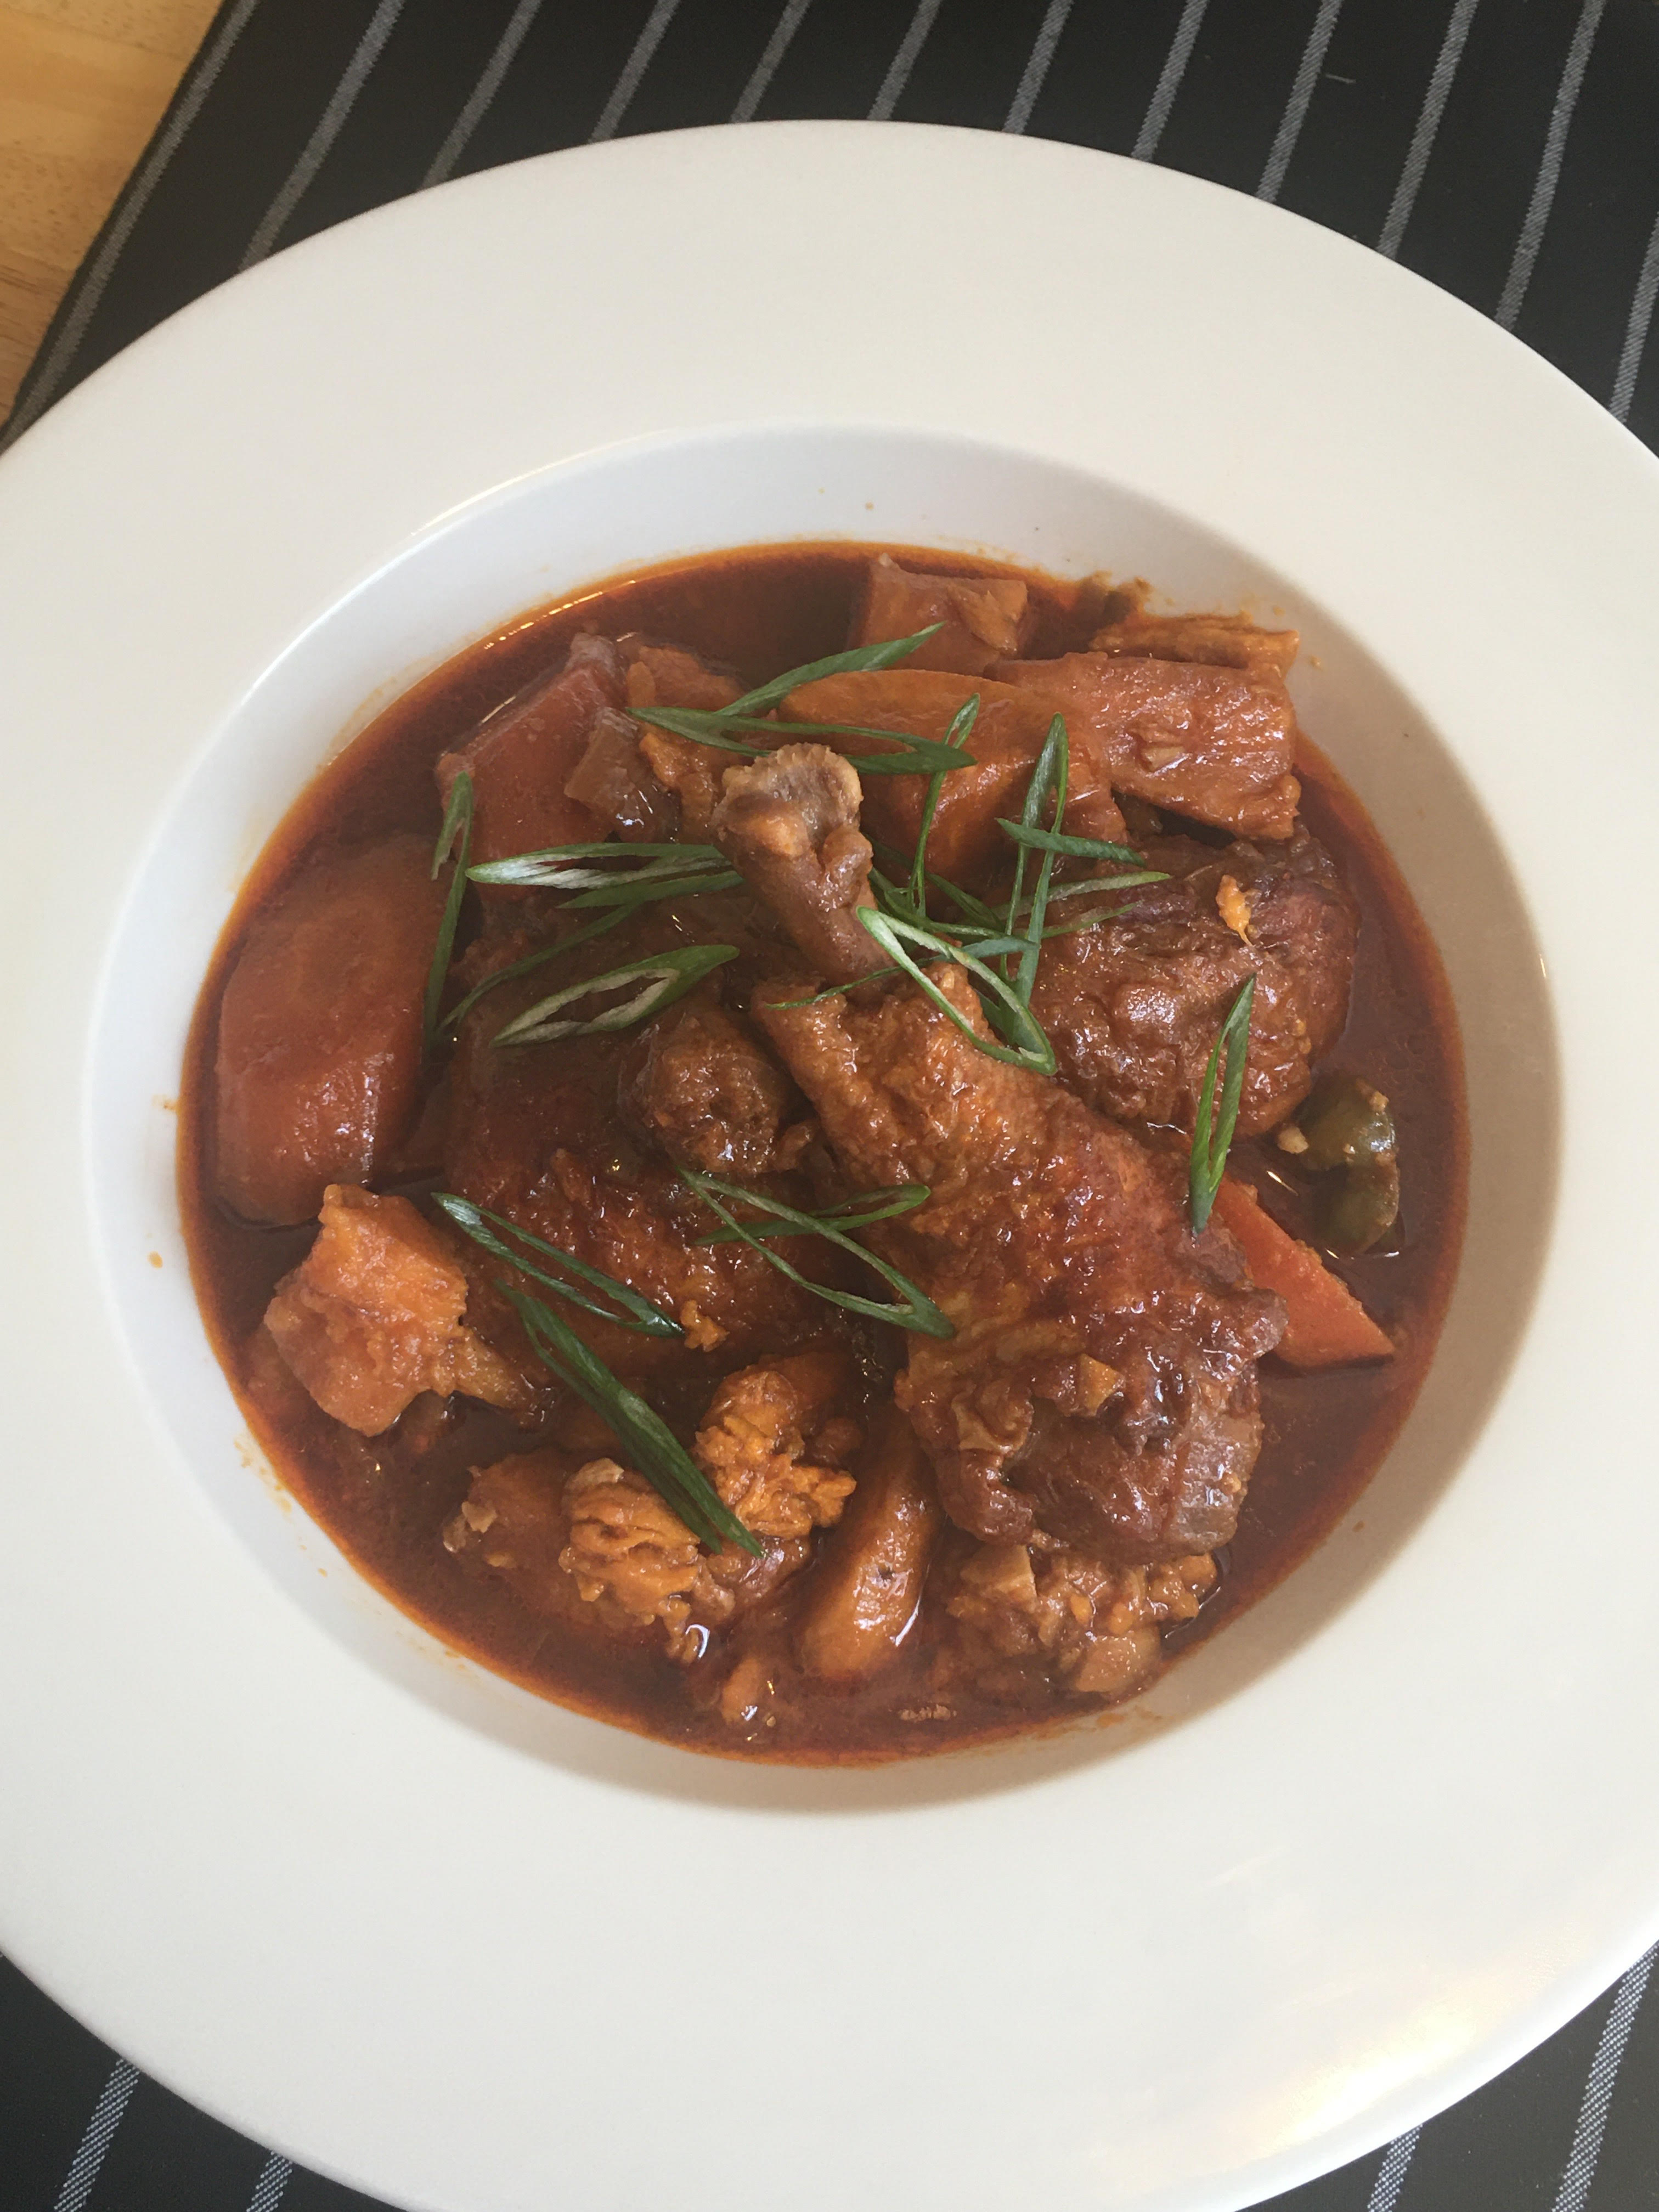 (Korean Spicy Chicken Stew, by Reggie Soang)


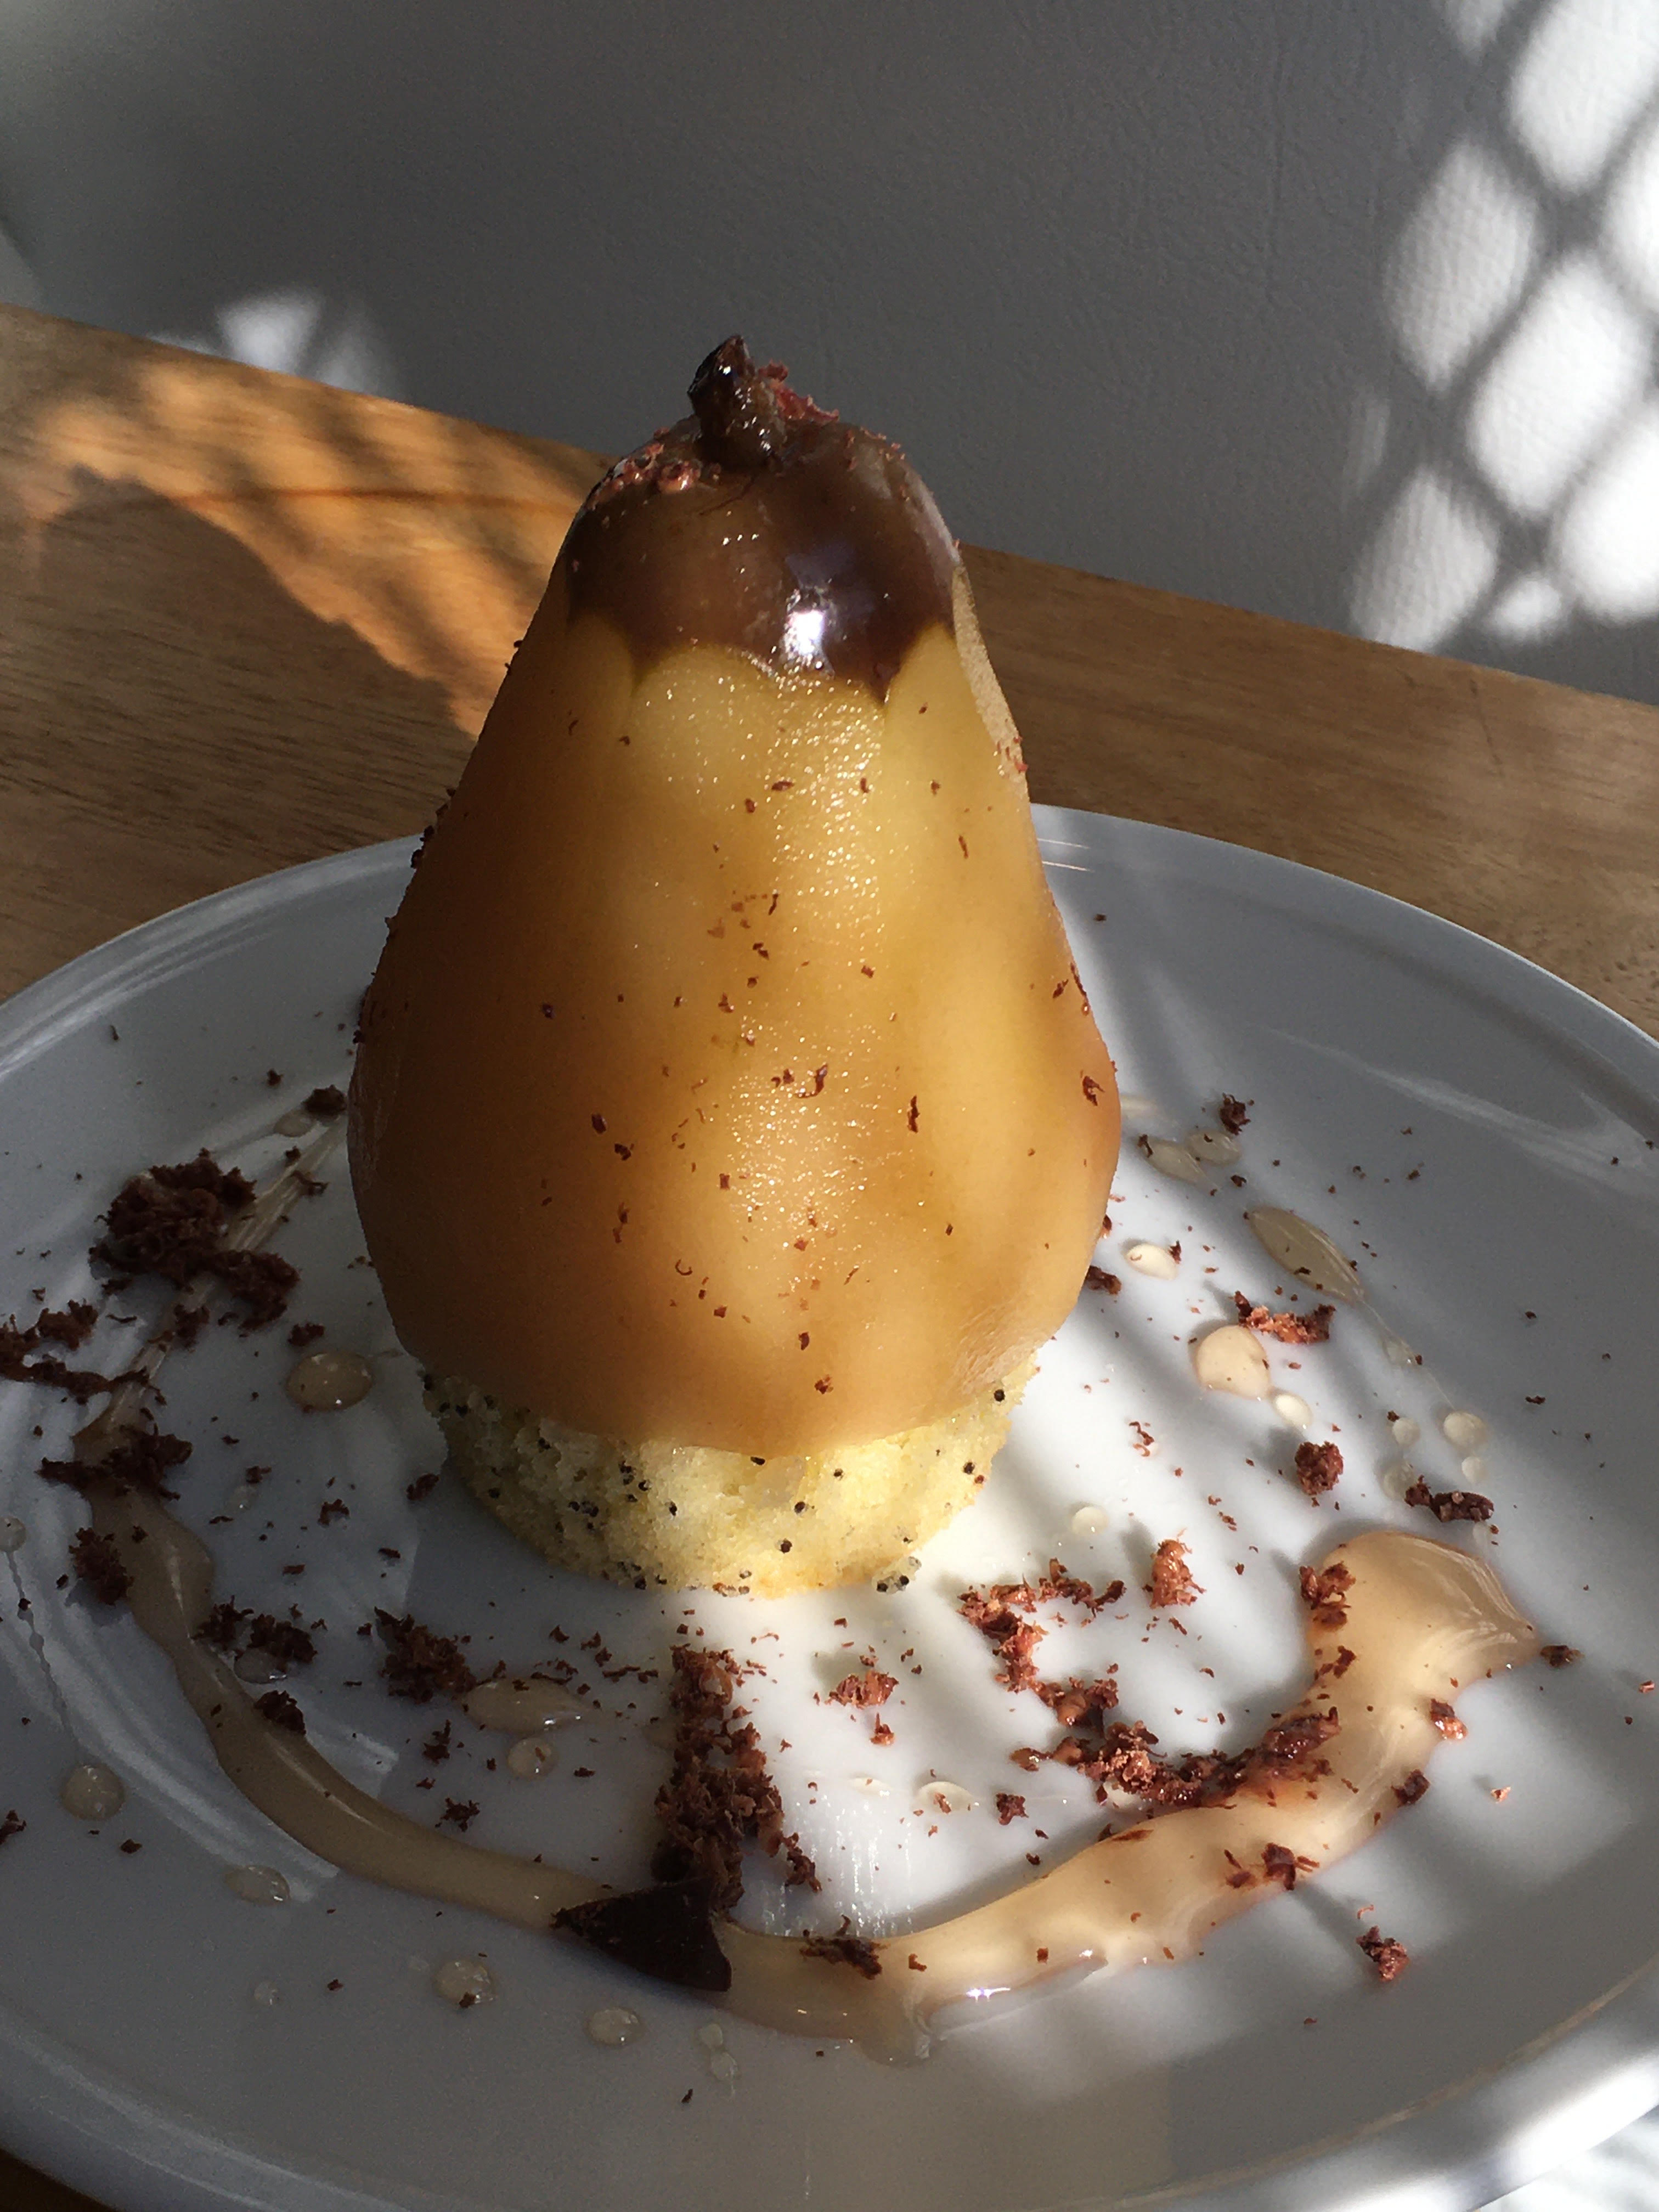 (Poached Pear, Lemon Poppy Seed Cake, and Dark Chocolate, by Reggie Soang)
 (Lemon Poppy Seed Muffins w/ Lemon Glaze, by Reggie Soang)
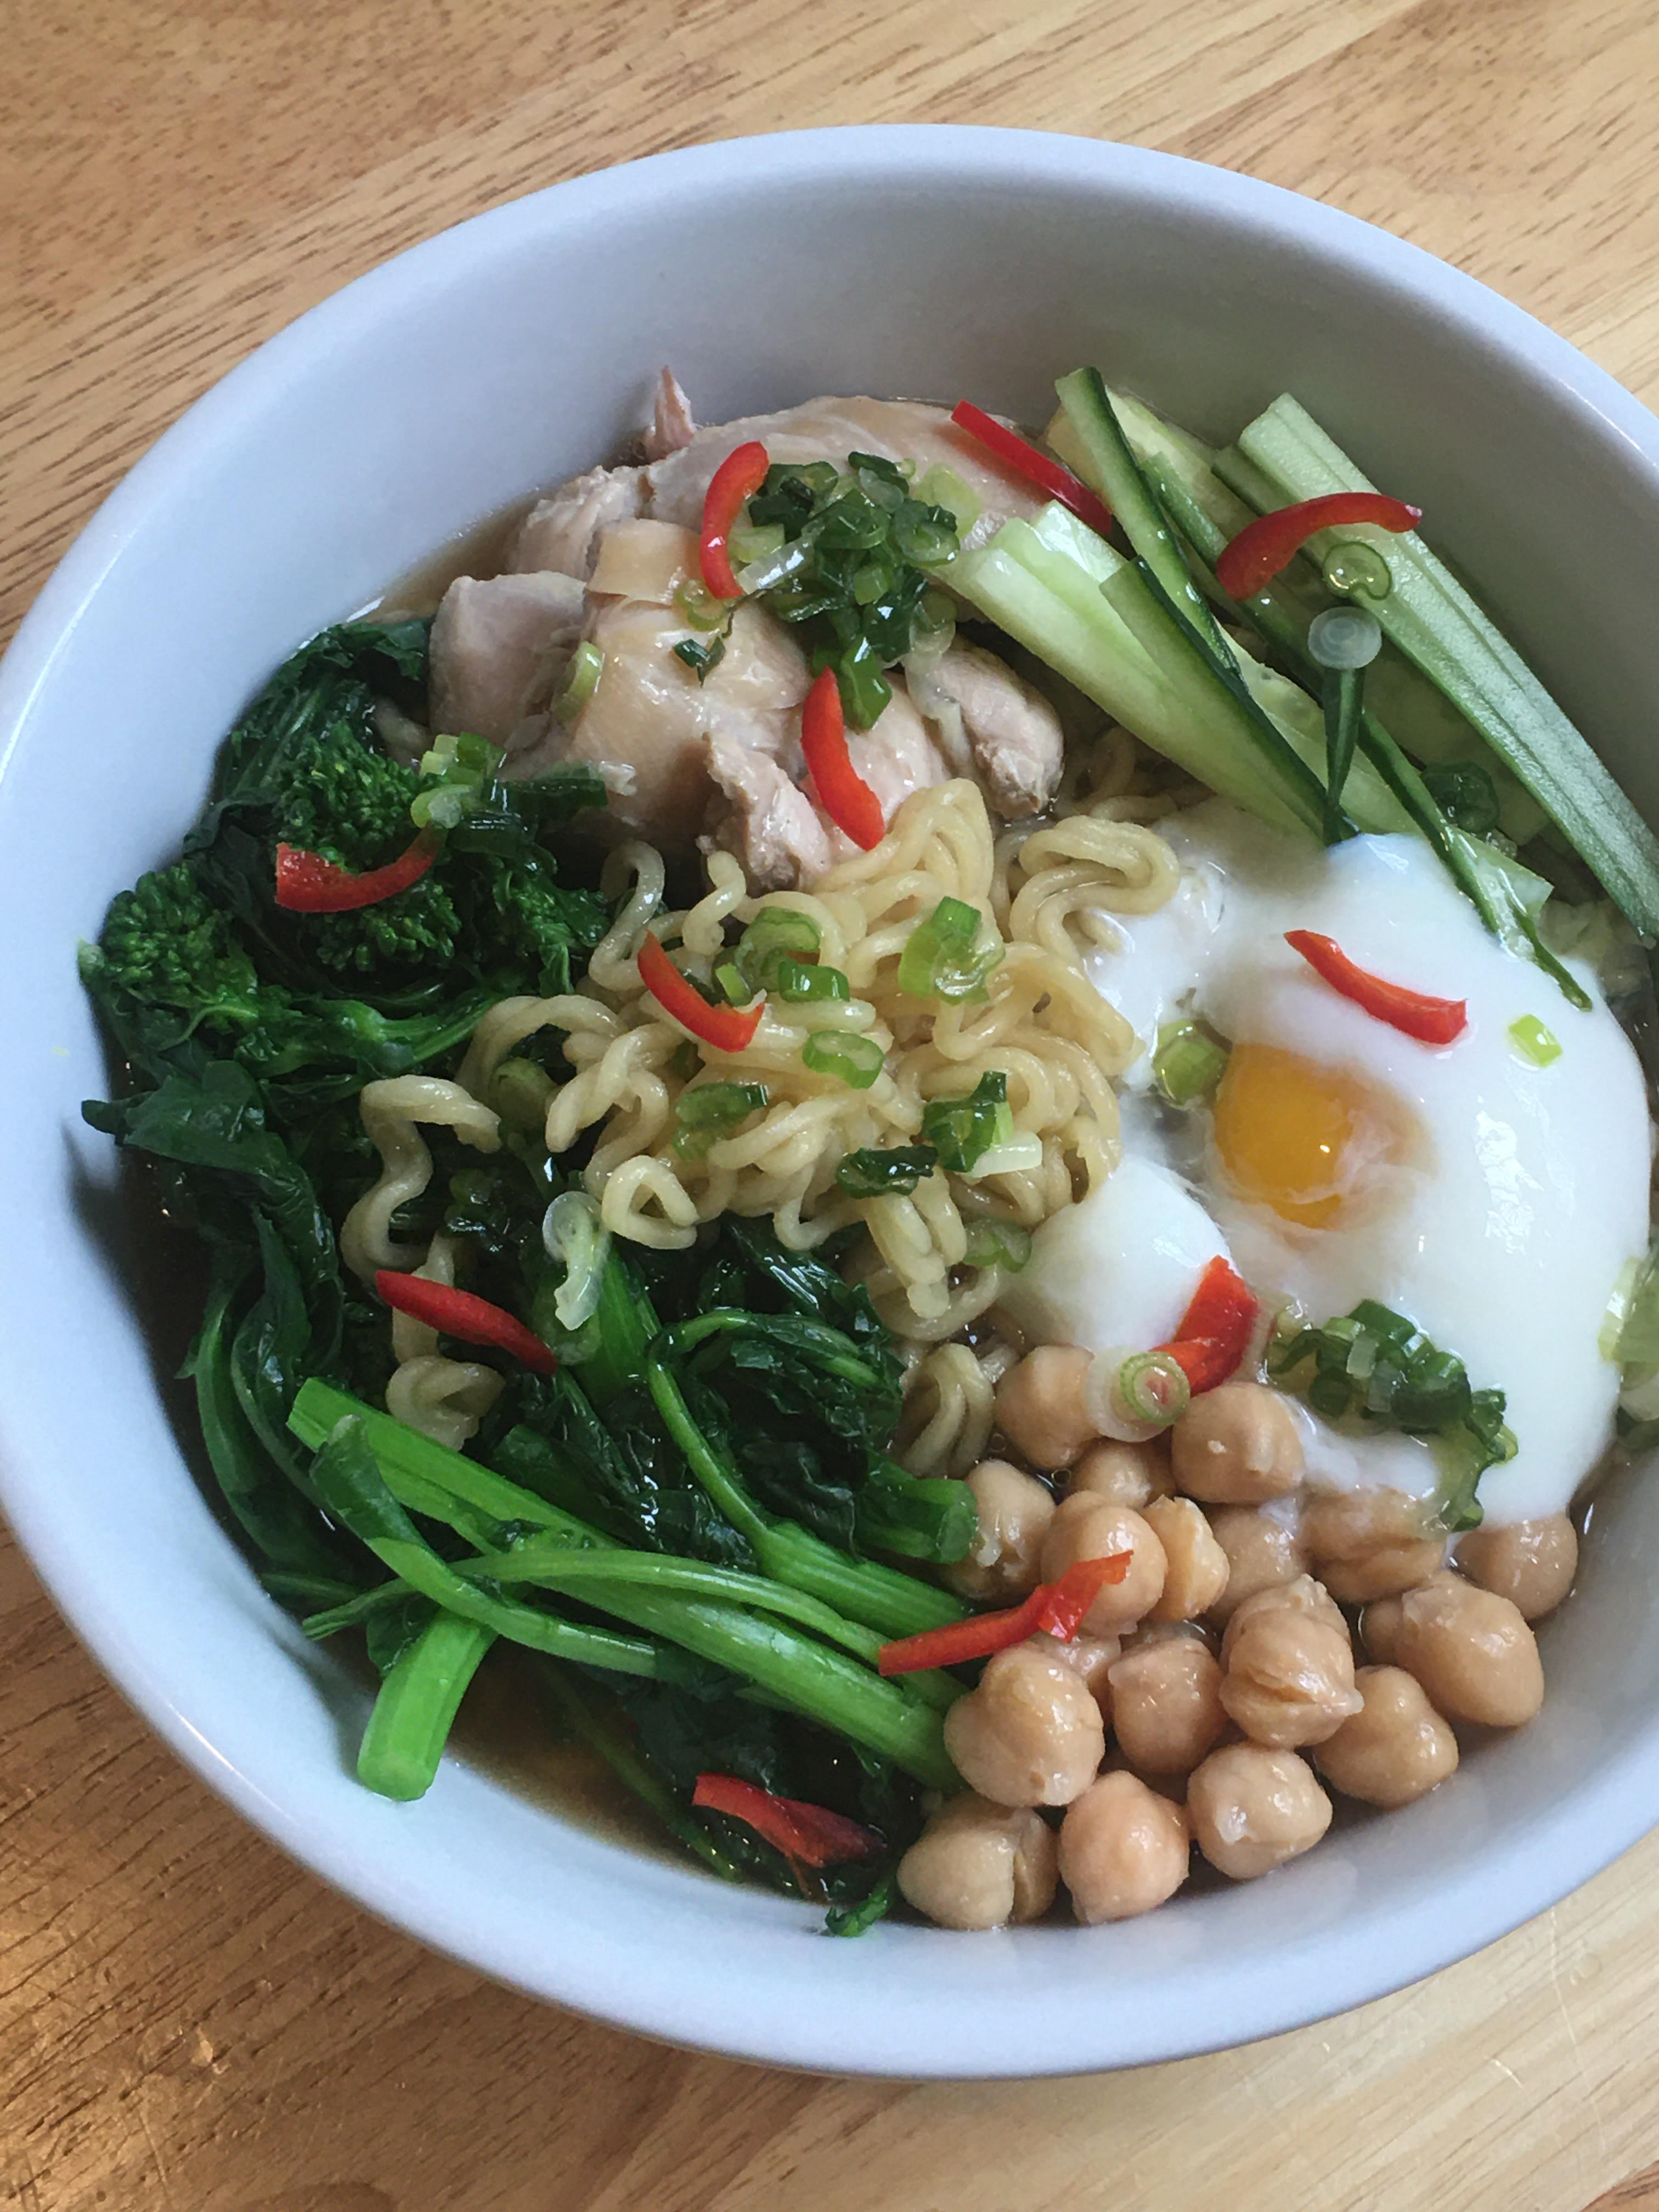 (Ramen, Broccoli Rabe, Chickpeas, Chicken, and Poached Egg, by Reggie Soang)